If you plan on assembling your vent using multiple pieces, mark the length you need for the segment youre preparing. Complete DIY projects like a pro! Improper installations on dryer ducts are rampant.  Now slide the dryer into place and use the level to see that it rests flat on the floor.
 Secure the dryer vent hood to the siding on the homes exterior using wood screws, For masonry homes, use appropriate anchors instead of wood screws. However if Also there should be no screens included at the end of the dryer exhaust vent. vent dryer 5ft ventilation ducting flexible aluminum supplies air kitchen Gas vs. Electric Dryers: Which Is Better? Dryer For masonry, drill closely-spaced holes around the circumference of the circle that marks the opening. Break out the masonry with a cold chisel. Cut the siding to fit around it. Youll want to decide between vent clamps or foil tape to secure the dryer venting to the dryer exhaust outlet and wall vent. This keeps intruders out when properly maintained. To use a tube clamp, unscrew the clamp to loosen it. Then, chip the masonry away with a chisel. Duct joints shall be installed so that the male end of the duct points in the direction of the airflow. Cleaning a dryer can help prevent odors and residue. duct foil aluminum flexible inch insulated feet dundas jafine ductwork residential foot depot This article was co-authored by wikiHow Staff. Sign in to unlock deals on major appliancesSee DetailsShop Sales.
We use your information in accordance with ourprivacy policy.
Use a section of vent pipe to mark a circle where the opening will be from inside of your home. flexible 211l
There are 8 references cited in this article, which can be found at the bottom of the page. Each connection of duct pipe needs to be held together and any lengths of pipe longer than a few feet need to be supported. Transfer that measurement inside, if necessary, to mark the new dryer vent center. c 7.4 cu. Dryer duct construction -It is important that dryer ducts vent to the exterior of the home and not into attics or other enclosed areas which can become a breeding gound for molds. Clean, unobstructed, frictionless ducts encourage air flow efficiency, quickens drying times, adds longevity to clothing's life and reduces utility bills. Dont forget to clean outside, too. Remove any build-up of trapped lint in your dryer before installing your new dryer vent. Then, attach the hose to your dryers exhaust port and vent hood, securing the ends with foil tape or hose clamps. Slip it onto the hose, line it up over the connecting seam, then tighten it back up. If youre using a tube clamp, loosen up the clamp by unscrewing it. All dryer ducting must be a minimum of 4" in diameter. the backdraft damper is maintained through regular cleaning, this should not be a problem. Thanks to all authors for creating a page that has been read 182,780 times. We recommend our users to update the browser. hole saw. Concealed ducting must be rigid metal (galvanized or aluminum) duct. metal. Semi-rigid and flexible ductwork varieties are prone to collecting more lint. Then trace a 4-1/2 in. : / 2022 Whirlpool. prettyhandygirl semi Our team of qualified professionals are ready to help you remove a serious threat to your home and happiness! By code flexible materials, such as foil, plastic, and semi-rigid metal are not allowed in order to eliminate potential fire hazards.
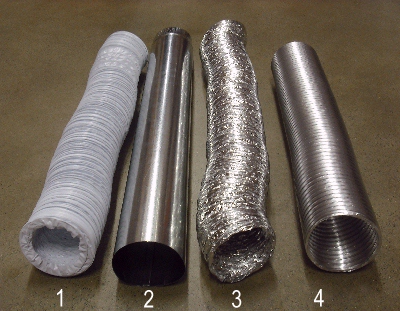
They are numbered here for easy reference. Finishing the hole from the opposite side will help make a smoother opening and minimize uneven splintering on the homes exterior. Only valid for new orders on whirlpool.com. This is a flexible aluminium foil and is not recommended for use in dryer vents -easy for fire to spread . Make sure your vent hose is short, supported and has very little slack once its fully installed behind the dryer. Periodically check the damper at the exterior to make sure it's clean; when lint accumulates at the damper it will eventually cause the damper to stay open. Be sure to take into account distance adjustments created from appliances resting on top of. If your space is already equipped with venting hookups, read on for a step-by-step guide on how to install a dryer vent. Place the vent cap over the hole so that its top rests on the high point of the siding. 
This site only ships to the United States. foil dryer aluminum duct flexible vent clothes larger At least once a year, snake a vacuum hose into the dryer duct to clean it.
Providing your exact location will allow us to ensure our products are available in your area. Hang in there, we are looking for alternate products just for you.
Youre currently browsing the US version of Whirlpool's site. Do not use the plastic or vinyl. flexible foil dryer vent aluminum clothes duct tube larger problems with your dryer vent system, give us a call, we can help.
Please provide a US ZIP code. If the hole is a little high or low, measure the distance from the pilot hole to the center of the vent cap duct. Flexible ducting is generally less expensive than semi rigid ducting, but is more prone to kinking and sagging. Once you've decided on a vent location and planned the dryer duct route, measure the length of the run, allowing for bends. Working from one end, push the edges down slightly as you force them together. wikiHow is where trusted research and expert knowledge come together. Last Updated: September 15, 2021 Then, remove as much lint as possible by hand. lint is flammable, and the more that accumulates in the dryer and the duct, the greater the risk. Some people install screens because they are concerned about animals getting into the dryer ductwork.
vent vivohome hoses clamps flexibele conducto conductos Check the vent hood frequently and brush out any visible buildup. Never use sheet metal screws because the fasteners will catch lint, which is a fire hazard. This will help to avoid moisture from sitting in the pipe or draining back to the dryer. Measure the distance between the elbows, including the overlap from the connection at each end. Safety Tip: If venting a gas dryer, check with local building codes or manufacturers instructions. In thepicture below I've included four types of pipe for you to familiarize yourself with.
dryer vent flexible flat foil duct imperial ft The entire duct needs to be supported and secured, and no screws are allowed on the joints because they could accumulate lint. This will minimize lint build-up within the pipe. dryer rigidity exhaust ducts foil If the dryer is against an exterior wall that is not underground, run the duct straight out from the back of the dryer. However, the gas poses a danger when it is allowed to accumulate.
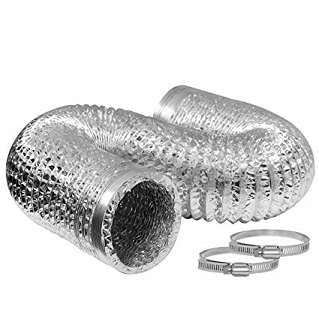
Be sure to clean out the connective ducting as well as the opening to the dryer exhaust outlet and vent hood duct on the wall. Use of this site is subject to certain Terms Of Use. Both of these options come in 4-inch diameter tubing and can effectively vent dryer exhaust. See your cart at checkout to determine if you qualify for installation of your new appliance. To remove a dryer duct, begin by unplugging the dryer if it is electric, or turn off the supply valve if it is a gas dryer. Use foil tape wrapped around seams to seal connections. If you used vent clamps to secure the dryer vent, you may need a screwdriver to help you disconnect. Install a duct elbow onto the dryer, if necessary. Put it on the hose and make sure its lined up with the connecting seam, then tighten it. Learning how to install a dryer vent involves some planning and attention to detail, but its an essential step of dryer installation. A ventless dryer offers flexible installation and space-saving options.
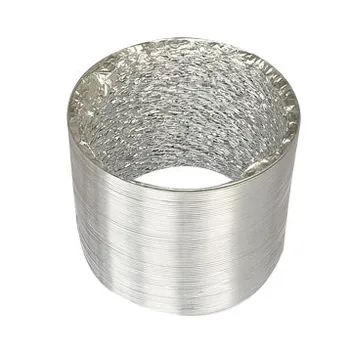
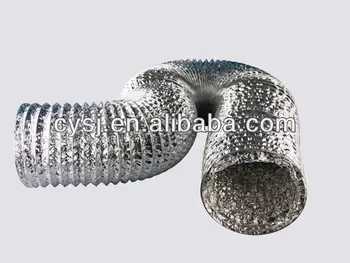
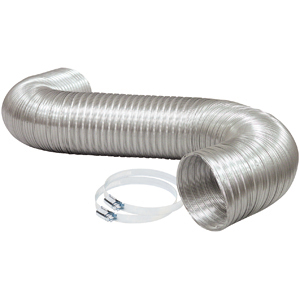
Learn all about the differences between gas and electric dryers, including hookups required, efficiency considerations, operating costs and more. Flexible transition hose between the dryer and the wall outlet should be either the foil type or the aluminum flexible duct (most preferred). The code says they should be made from metal, at least 4" in diameter, and have a smooth interior.
We are no longer supporting IE (Internet Explorer) as we strive to provide site experiences for browsers that support new web standards and security practices. Buy enough straight duct and fittings to complete the job, including an outdoor cap. Some basement installations require a vertical ascent using 90-degree elbows to reach an outside wall. Our trained team of editors and researchers validate articles for accuracy and comprehensiveness. This guide teaches you how to hook up a dryer vent properly, whether you are venting a gas dryer or an electric dryer. This article has been viewed 182,780 times. This will obviously reduce your dryer's effectiveness to eliminate the moist hot air and create a blockage which becomes potential fire hazard. If cutting through stucco or brick, use a hammer drill and a 1/4-inch masonry bit to create both the pilot hole and to cut out the vent hole. Length of concealed rigid metal ducting shall not exceed 25 feet. Another common installation defect is the length of the duct. Freshly cut edges of duct metal are extremely sharp and even light contact with an edge can cause injury. Total: (Before Taxes, Shipping, and Services): Link your shopping cart across all your devices! flexible All rights reserved. If the ducting is long or snaking back and forth after installation, use your measurements to determine how much you need to trim for a snug fit.
dryer exhaust ducts workability This is flexible metal galvanized pipe and can be used for transitions. % of people told us that this article helped them. The route should be as short as possible but there are other guidelines to follow when venting a dryer: Its best to route the dryer vent in a horizontal path to the homes outside wall.
Remove the hole saw frequently to keep it cool and to remove debris. Venting a dryer removes the warm, moist air created from forced heat evaporating the water from your freshly washed laundry. foil ventilation duct ul flexible There are two good ways to install dryer vents through vinyl siding. dryer vent exhaust hose installation materials duct material ducts venting problems into plastic Grab a measuring tape to measure the distance from the dryers exhaust to the location of the vent outlet grill on the exterior wall. Avoid using anything that would protrude into the venting, such as screws, to secure the hose as lint can snag on screws and build up over time. After installing a dryer vent, keep it clean. All tip submissions are carefully reviewed before being published. A dryer vent system is designed to remove heat, moisture and lint from your dryer and if you You may have two elbows back-to-back to get the run to line up the path from the dryer. dryer hose vent vinyl foil rigid metal proof fire semi hoses should why use duct Variable Speed Hammer Drill, Best Washing Machine Stands and Kits for Your Laundry Room, Buy Hampton Bay 16.5 in.
Remove the vent cover from the exhaust hood on the outside of your home and clean the dryer vent using a vacuum hose. masonry bit and hammer drill. Cut straight lengths of rigid pipe using tin snips.
everbilt duct {"smallUrl":"https:\/\/www.wikihow.com\/images\/thumb\/5\/58\/Install-a-Dryer-Vent-Hose-Step-1.jpg\/v4-460px-Install-a-Dryer-Vent-Hose-Step-1.jpg","bigUrl":"\/images\/thumb\/5\/58\/Install-a-Dryer-Vent-Hose-Step-1.jpg\/aid9610267-v4-728px-Install-a-Dryer-Vent-Hose-Step-1.jpg","smallWidth":460,"smallHeight":345,"bigWidth":728,"bigHeight":546,"licensing":"
License: Creative Commons<\/a> License: Creative Commons<\/a> License: Creative Commons<\/a> License: Creative Commons<\/a> License: Creative Commons<\/a> License: Creative Commons<\/a> License: Creative Commons<\/a> License: Creative Commons<\/a> License: Creative Commons<\/a> License: Creative Commons<\/a> License: Creative Commons<\/a> License: Creative Commons<\/a> License: Creative Commons<\/a> License: Creative Commons<\/a> License: Creative Commons<\/a> License: Creative Commons<\/a> License: Creative Commons<\/a> License: Creative Commons<\/a>
\n<\/p>
\n<\/p><\/div>"}, {"smallUrl":"https:\/\/www.wikihow.com\/images\/thumb\/5\/51\/Install-a-Dryer-Vent-Hose-Step-2.jpg\/v4-460px-Install-a-Dryer-Vent-Hose-Step-2.jpg","bigUrl":"\/images\/thumb\/5\/51\/Install-a-Dryer-Vent-Hose-Step-2.jpg\/aid9610267-v4-728px-Install-a-Dryer-Vent-Hose-Step-2.jpg","smallWidth":460,"smallHeight":345,"bigWidth":728,"bigHeight":546,"licensing":"
\n<\/p>
\n<\/p><\/div>"}, {"smallUrl":"https:\/\/www.wikihow.com\/images\/thumb\/d\/d6\/Install-a-Dryer-Vent-Hose-Step-3.jpg\/v4-460px-Install-a-Dryer-Vent-Hose-Step-3.jpg","bigUrl":"\/images\/thumb\/d\/d6\/Install-a-Dryer-Vent-Hose-Step-3.jpg\/aid9610267-v4-728px-Install-a-Dryer-Vent-Hose-Step-3.jpg","smallWidth":460,"smallHeight":345,"bigWidth":728,"bigHeight":546,"licensing":"
\n<\/p>
\n<\/p><\/div>"}, {"smallUrl":"https:\/\/www.wikihow.com\/images\/thumb\/c\/c1\/Install-a-Dryer-Vent-Hose-Step-4.jpg\/v4-460px-Install-a-Dryer-Vent-Hose-Step-4.jpg","bigUrl":"\/images\/thumb\/c\/c1\/Install-a-Dryer-Vent-Hose-Step-4.jpg\/aid9610267-v4-728px-Install-a-Dryer-Vent-Hose-Step-4.jpg","smallWidth":460,"smallHeight":345,"bigWidth":728,"bigHeight":546,"licensing":"
\n<\/p>
\n<\/p><\/div>"}, {"smallUrl":"https:\/\/www.wikihow.com\/images\/thumb\/d\/d3\/Install-a-Dryer-Vent-Hose-Step-5.jpg\/v4-460px-Install-a-Dryer-Vent-Hose-Step-5.jpg","bigUrl":"\/images\/thumb\/d\/d3\/Install-a-Dryer-Vent-Hose-Step-5.jpg\/aid9610267-v4-728px-Install-a-Dryer-Vent-Hose-Step-5.jpg","smallWidth":460,"smallHeight":345,"bigWidth":728,"bigHeight":546,"licensing":"
\n<\/p>
\n<\/p><\/div>"}, {"smallUrl":"https:\/\/www.wikihow.com\/images\/thumb\/b\/b0\/Install-a-Dryer-Vent-Hose-Step-6.jpg\/v4-460px-Install-a-Dryer-Vent-Hose-Step-6.jpg","bigUrl":"\/images\/thumb\/b\/b0\/Install-a-Dryer-Vent-Hose-Step-6.jpg\/aid9610267-v4-728px-Install-a-Dryer-Vent-Hose-Step-6.jpg","smallWidth":460,"smallHeight":345,"bigWidth":728,"bigHeight":546,"licensing":"
\n<\/p>
\n<\/p><\/div>"}, {"smallUrl":"https:\/\/www.wikihow.com\/images\/thumb\/a\/a5\/Install-a-Dryer-Vent-Hose-Step-7.jpg\/v4-460px-Install-a-Dryer-Vent-Hose-Step-7.jpg","bigUrl":"\/images\/thumb\/a\/a5\/Install-a-Dryer-Vent-Hose-Step-7.jpg\/aid9610267-v4-728px-Install-a-Dryer-Vent-Hose-Step-7.jpg","smallWidth":460,"smallHeight":345,"bigWidth":728,"bigHeight":546,"licensing":"
\n<\/p>
\n<\/p><\/div>"}, {"smallUrl":"https:\/\/www.wikihow.com\/images\/thumb\/f\/fd\/Install-a-Dryer-Vent-Hose-Step-8.jpg\/v4-460px-Install-a-Dryer-Vent-Hose-Step-8.jpg","bigUrl":"\/images\/thumb\/f\/fd\/Install-a-Dryer-Vent-Hose-Step-8.jpg\/aid9610267-v4-728px-Install-a-Dryer-Vent-Hose-Step-8.jpg","smallWidth":460,"smallHeight":345,"bigWidth":728,"bigHeight":546,"licensing":"
\n<\/p>
\n<\/p><\/div>"}, {"smallUrl":"https:\/\/www.wikihow.com\/images\/thumb\/7\/79\/Install-a-Dryer-Vent-Hose-Step-9.jpg\/v4-460px-Install-a-Dryer-Vent-Hose-Step-9.jpg","bigUrl":"\/images\/thumb\/7\/79\/Install-a-Dryer-Vent-Hose-Step-9.jpg\/aid9610267-v4-728px-Install-a-Dryer-Vent-Hose-Step-9.jpg","smallWidth":460,"smallHeight":345,"bigWidth":728,"bigHeight":546,"licensing":"
\n<\/p>
\n<\/p><\/div>"}, {"smallUrl":"https:\/\/www.wikihow.com\/images\/thumb\/d\/d5\/Install-a-Dryer-Vent-Hose-Step-10.jpg\/v4-460px-Install-a-Dryer-Vent-Hose-Step-10.jpg","bigUrl":"\/images\/thumb\/d\/d5\/Install-a-Dryer-Vent-Hose-Step-10.jpg\/aid9610267-v4-728px-Install-a-Dryer-Vent-Hose-Step-10.jpg","smallWidth":460,"smallHeight":345,"bigWidth":728,"bigHeight":546,"licensing":"
\n<\/p>
\n<\/p><\/div>"}, {"smallUrl":"https:\/\/www.wikihow.com\/images\/thumb\/e\/e1\/Install-a-Dryer-Vent-Hose-Step-11.jpg\/v4-460px-Install-a-Dryer-Vent-Hose-Step-11.jpg","bigUrl":"\/images\/thumb\/e\/e1\/Install-a-Dryer-Vent-Hose-Step-11.jpg\/aid9610267-v4-728px-Install-a-Dryer-Vent-Hose-Step-11.jpg","smallWidth":460,"smallHeight":345,"bigWidth":728,"bigHeight":546,"licensing":"
\n<\/p>
\n<\/p><\/div>"}, {"smallUrl":"https:\/\/www.wikihow.com\/images\/thumb\/f\/fc\/Install-a-Dryer-Vent-Hose-Step-12.jpg\/v4-460px-Install-a-Dryer-Vent-Hose-Step-12.jpg","bigUrl":"\/images\/thumb\/f\/fc\/Install-a-Dryer-Vent-Hose-Step-12.jpg\/aid9610267-v4-728px-Install-a-Dryer-Vent-Hose-Step-12.jpg","smallWidth":460,"smallHeight":345,"bigWidth":728,"bigHeight":546,"licensing":"
\n<\/p>
\n<\/p><\/div>"}, {"smallUrl":"https:\/\/www.wikihow.com\/images\/thumb\/c\/c1\/Install-a-Dryer-Vent-Hose-Step-13.jpg\/v4-460px-Install-a-Dryer-Vent-Hose-Step-13.jpg","bigUrl":"\/images\/thumb\/c\/c1\/Install-a-Dryer-Vent-Hose-Step-13.jpg\/aid9610267-v4-728px-Install-a-Dryer-Vent-Hose-Step-13.jpg","smallWidth":460,"smallHeight":345,"bigWidth":728,"bigHeight":546,"licensing":"
\n<\/p>
\n<\/p><\/div>"}, {"smallUrl":"https:\/\/www.wikihow.com\/images\/thumb\/8\/8f\/Install-a-Dryer-Vent-Hose-Step-14.jpg\/v4-460px-Install-a-Dryer-Vent-Hose-Step-14.jpg","bigUrl":"\/images\/thumb\/8\/8f\/Install-a-Dryer-Vent-Hose-Step-14.jpg\/aid9610267-v4-728px-Install-a-Dryer-Vent-Hose-Step-14.jpg","smallWidth":460,"smallHeight":345,"bigWidth":728,"bigHeight":546,"licensing":"
\n<\/p>
\n<\/p><\/div>"}, {"smallUrl":"https:\/\/www.wikihow.com\/images\/thumb\/a\/a5\/Install-a-Dryer-Vent-Hose-Step-15.jpg\/v4-460px-Install-a-Dryer-Vent-Hose-Step-15.jpg","bigUrl":"\/images\/thumb\/a\/a5\/Install-a-Dryer-Vent-Hose-Step-15.jpg\/aid9610267-v4-728px-Install-a-Dryer-Vent-Hose-Step-15.jpg","smallWidth":460,"smallHeight":345,"bigWidth":728,"bigHeight":546,"licensing":"
\n<\/p>
\n<\/p><\/div>"}, {"smallUrl":"https:\/\/www.wikihow.com\/images\/thumb\/0\/0f\/Install-a-Dryer-Vent-Hose-Step-16.jpg\/v4-460px-Install-a-Dryer-Vent-Hose-Step-16.jpg","bigUrl":"\/images\/thumb\/0\/0f\/Install-a-Dryer-Vent-Hose-Step-16.jpg\/aid9610267-v4-728px-Install-a-Dryer-Vent-Hose-Step-16.jpg","smallWidth":460,"smallHeight":345,"bigWidth":728,"bigHeight":546,"licensing":"
\n<\/p>
\n<\/p><\/div>"}, {"smallUrl":"https:\/\/www.wikihow.com\/images\/thumb\/8\/86\/Install-a-Dryer-Vent-Hose-Step-17.jpg\/v4-460px-Install-a-Dryer-Vent-Hose-Step-17.jpg","bigUrl":"\/images\/thumb\/8\/86\/Install-a-Dryer-Vent-Hose-Step-17.jpg\/aid9610267-v4-728px-Install-a-Dryer-Vent-Hose-Step-17.jpg","smallWidth":460,"smallHeight":345,"bigWidth":728,"bigHeight":546,"licensing":"
\n<\/p>
\n<\/p><\/div>"}, {"smallUrl":"https:\/\/www.wikihow.com\/images\/thumb\/9\/94\/Install-a-Dryer-Vent-Hose-Step-18.jpg\/v4-460px-Install-a-Dryer-Vent-Hose-Step-18.jpg","bigUrl":"\/images\/thumb\/9\/94\/Install-a-Dryer-Vent-Hose-Step-18.jpg\/aid9610267-v4-728px-Install-a-Dryer-Vent-Hose-Step-18.jpg","smallWidth":460,"smallHeight":345,"bigWidth":728,"bigHeight":546,"licensing":"
\n<\/p>
\n<\/p><\/div>"}, {"smallUrl":"https:\/\/www.wikihow.com\/images\/thumb\/c\/c8\/Install-a-Dryer-Vent-Hose-Step-19.jpg\/v4-460px-Install-a-Dryer-Vent-Hose-Step-19.jpg","bigUrl":"\/images\/thumb\/c\/c8\/Install-a-Dryer-Vent-Hose-Step-19.jpg\/aid9610267-v4-728px-Install-a-Dryer-Vent-Hose-Step-19.jpg","smallWidth":460,"smallHeight":345,"bigWidth":728,"bigHeight":546,"licensing":"flexible foil duct for dryer installation