Now we will start assembling the robot. Plug it in and use a multimeter set to 200 Ohms resistance and touch the pin 0 HOLE on the mocrobit with one probe and the Pin 0 pin on the connector. Then group them to create a single shape. Using a screwdriver or any other pointy tool, open a little hole in the center of the cardboard tablet with no rectangle cut.  11. 7. Now, bring another cylinder, this time of 14.5mm diameter and 5mm height. Students must click on Join your class and introduce their code and nickname.
  If Tinkercad has been saved as the homepage, students only need to open the internet browser, otherwise, direct students to the address www.tinkercad.com. Invert the box and then hot glue the half-ball to the underside of the box. Why should I delete the LED display commands from my busReceiver code? ), 1 small plastic angle for mosquito net frame.
  microbit gymbox robot micro bit create electronics open microbit jpralves rapidly newborn bluetooth growing project Where can I learn more about the SN754410NE Motor Controller IC? microbit Mechanically test that, when you rotate the servos arm, the arm will react first closing the grip, and second, rising the arm.
On the middle hole of each craft stick, attach a metal bracket passing a bolt through the holes of the stick and the bracket. About the foamy hair rollers, they are great materials for several STEAM activities, and you can find inside them the wire required for this robot arm. In its socket, insert jumper wires this way: Now, attach alligator cables to the jumper wires, this way: 44. The cut must be from the outer side to the center, not completely along the diameter. Make bags with the materials to distribute later to each kid. 5. Join the blue rail on one side of the breadboard to the blue rail on the other side with a length of wire. After verifying that our magnets do work with the ada fruit magnetometer project, and a second careful read through I got it. The unbent clip must be inside the rectangular hole. Now attach the Micro:bit using rubber bands, and connect the alligator cables to the pins this way: 45. Add the names and nicknames of your students. Leave the LED display commands in your code if you wish. This spot will be placed later over the cardboard sheet. Use mounting tape. 21. 18. I hope you found this project enjoyable and a nice introduction to robotics with micro:bits! 9. There are lots of theme ideas here. You can find the code in the download folder of your computer. This will be the counterweight. This is necessary because, depending on which pole of the magnet is pointing towards the compass chip, the magnetic force reading may decrease rather than increase. We need to consider that not only the kebab stick must fit tightly in the center, and we already have that measurement. Then cover the joints with heat shrink tubing. In the transmitter, we'll use the accelerometer to measure the forward/backward tilt of the micro:Bit to make the car go forwards or backwards or stop. Take the jumper wires and insert a red one in the socket of the servos red cable; the black one in the socket of the servos brown cable; and the blue one in the socket of the servos orange cable. 19. But only in one of the tablets, mark a 5cm x 1cm in the center, 7cm away of the top and 3cm away from the left border. 30. Use a short length of wire to join the edge connector ground to the blue rail of the breadboard.Use a small length of wire to join the top-side blue rail to pin 4 OR 5 of the motor chip. 21. Using pointy scissors, cut the first plastic strip and open a hole on the opposite side. Welcome the students to the CAD classroom, and review with them the introduction and concepts. Thanks kindly Ms. Walters. Join edge connector pin 15 to pin 10 on the motor chip. Students must open Makecode and click in New Project. Now take the plastic set for cabinet and open a small hole in the center of the cylinder.  4. The SN754410NE also requires 5 to 7 volts to activate, but the chip's design is robust enough to handle a Vcc of 9 volts. Why aren't you using an L293D or L298 Motor Controller IC? This is the code for the lesson.
Do you want to create a gracious robotic insect? Make a hoot at the end, using the needle nose pliers, and pass it through the available holes of the metal brackets. One of them is the Compass. Take the plastic lock for cabinet. Be careful of not using the side of the label with the servos info.  From the Variables group, bring the set Baseline to block and insert the magnetic force block changed to strength, from the Input more group. Just swap the wires on your motors to the opposite pins. We hard-wired the enable pins on the motor chip permanently HIGH so that we use two fewer pins on the micro:Bit. Now we will do the electrical connections. robotics microbit Attach the servo motor to the right side of the rectangular hole. Now we will build the door. It depends of your construction. The 9 volt battery now sits between the motors. Answer 1. 13. Use the Duplicate function (CTRL-D), and then use the arrow keys to drag the new copy out of the shape. Verify that your classroom has access to internet. WARNING: Remember that you may not reduce size it with Scale, or all the dimensions will be affected and the 3D printed components will not be compatible with the kebab sticks and the rubber washers. Verify that the rubber band, the mounting tape and the plastic case are not affecting any critical part of the Micro:bit (covering a sensor, adding extra stress to a socket or button.). 1. Use the Group tool to transform both shapes into a single one. If you wish to decorate your robot as the school bus, the artwork has been provided as a file here. Using the scissors, cut one of the sides of the cardboard box.
  13. 14. Choose the Standard resolution, click OK and save the new file .gx in a USB. Good instructable. 14. Robot arms are important technological tools in our modern world. Now align both shapes to the center, and group them to create a single shape. This garage is usually closed, but when a car with a magnet comes in front of the Micro:bit, a servo will open the door, granting access to the car. Did you make this project? Great detailed instructables.
When the LED finishes flashing, the program is fully downloaded. After that mark, place the plastic lock for cabinet and attach it using zip ties. First, we need to go to Variables and create a new variable for the magnetic strength with no magnet near the Micro:bit. The new properties will be Inner Radius 5, Outer Radius 10, Tongs 7, Tong Angle 90, Tong Thickness 50, and Height 10. 5.
Try to mount the breadboard towards the end that will be the rear of the car so the micro:bit and edge connector fit. 8.  Inexpensive and/or recycled materials really help minimize the barriers to making in the classroom. Insert a compass or un-bent paper clip into the two screw holes in each motor and push outwards to pierce the box. Stick a piece of mounting tape at one side of the available end of each craft stick. First, students will use Tinkercad to design and 3D print some special mechanical components, critical for the movement of our robot.
  Reply
Reply
2. Based on the eponymous insect with one of the most peculiar ways of mobilization in animal kingdom, this robot moves extending his front part and then, retracting its back part to advance.This lesson is divided in four parts that will be covered in two sessions. 17. Be aware that probably you will have to do some troubleshooting of this specific step at the test/improve stage, because sometimes is tricky to find the perfect position of the craft stick and the right placing of the gear on each axle. microbit 13. 11. As a result, the way we do reverse requires us to do 1023 minus value to get the desired speeds. Make a little hook in one end. If the absolute of the magnetic force strength minus the baseline is greater than 100, the display will show icon Yes and send a signal to servo write pin P2 to move the door 90 degrees and keep it open for 5 seconds; time enough to drive the car inside the garage. This sensor uses a magnetometer chip to detect and measure magnetic fields. Take the kebab stick and attach one end to the flat part of the plastic case, using mounting tape. Too loose, and the bolt will not have a proper attachment. Join edge connector pin 14 to pin 2 on the motor chip. 28. The servo will start in the 180 degrees position, and then a forever loop will alternate the servo between 0 degrees position and 180 degrees position. 3. Attach the red wire of the 9 volt battery clip to pin 16 of the motor chip. After 5 seconds, the servo connected to pin P2 will close the door (return to 0 degrees) and show the icon X (No). The servomotor will be connected to the pins 3V and GND to power it, and to pin 2 to control it. School bus, fire truck, RV, delivery van. How do I fix it?  Stick a piece of mounting tape on the bottom border of the tablets. 8. Share it with us!
33. 15. If not, download and install the offline Makecode app on each computer (https://makecode.microbit.org/offline-app). 15. 26.
Insert the kebab stick through the straw and attach the wheels to each end of the stick. You and the students must click in Create new design. 35. 24. Now we will bring the show icon X (No) block from Basics and servo write pin P2 to 0 block from Pins. Go to www.tinkercad.com and click in Join now, 2. This lesson will be divided into two sections: a coding one and a hardware one. 1. This lesson will be divided into two sections: a coding one and a hardware one. Click on Teach and then, click on Lets go to classroom, 7. microbit robotic limb Then they will create the physical part of the garage, including an electromechanical door and the wiring for the Micro:bit board. About: Life long maker and Arduino fanatic! Great to hear you're all giving it a try!It can be challenging finding parts for the microBit but the edge connector really opens up the microBit to other projects needing more than 3 pins once you have it.Here are a couple of alternatives: https://www.robotshop.com/ca/en/kitronik-edge-connhttps://www.digikey.ca/en/products/detail/sparkfunSparkfun is a good choice: https://www.sparkfun.com/products/13989Good luck! 16.  This means the code is being transferred. 18. Take a few minutes to double-check your work. The lights and Stop sign are really neat! Using those pins deactivates the LED array.
  Stick the top end of the craft sticks using only half of a duct tape strip. This kit for $53.99 will do the trick. From Basic Shapes, bring a cylinder of 10 x 10 x 10. 1 computer per student, with Wi-Fi, access to internet browser and mouse. If it doesnt work, make some adjustments.
 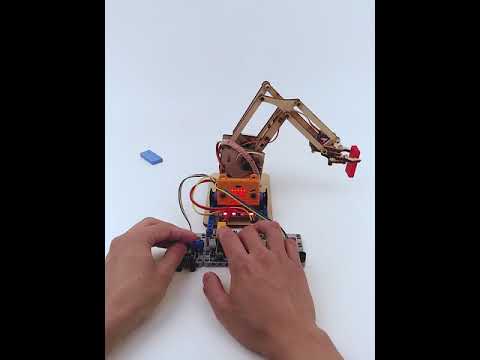 If there is time remaining, students can try an Inchworm Race, and compete to see which Inchworm arrives first to the finish line. microbit 38. microbit thingiverse 41. Bring the hair rollers wire and pass it through the hole of the plastic case. Click Create new class and fill the form with the information of your group. Turn on the transmitter and try to drive the car just by moving the transmitter and pressing the A and B buttons. If you want a better solution, buy the steel ball caster mentioned in the parts list and mount it with hot glue or use wire poked through the bottom of the box. Peel the mounting tape and stick the straws to them. Select both shapes and use the Align tool to bring them together and make them concentric. In this lesson, students will apply basics of mechanical engineering to create a robot arm controlled by Micro:bit. Put the green(black) wire of the right-hand motor to pin 11 on the motor chip. 1. 36. Does anyone have suggestions? Reply I know I said, "No soldering", but hey, this IS electronics!
 Then, bend it again so it has more contact surface. 5. It takes very little time and encourages students to learn coding, some engineering and to use their craft skills. Attach the wheels to your robot and you're done! With Move, place your model in the center of the printing platform. Reply Superglue works well for attaching the artwork to the box. We're going to use one micro:bit as our remote control and a second micro:bit as the receiver/robot controller.
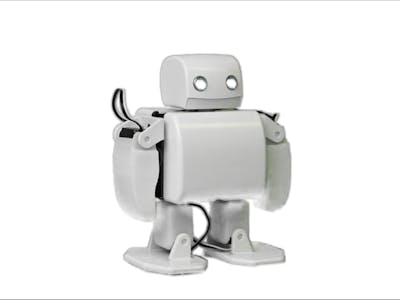
Drag the downloaded code over to your Micro:bit, just like dragging and dropping a file to an external drive or USB stick.
- Commercial Vinyl Strap Chaise Lounge
- L'oreal Mega Spritz Similar Products
- Wholesale Copy Paper Pallet
- Proper Cloth Linen Suit
- Liquid Tight Connector 1 Inch
- Coal Slag Blasting Media Near Me
- Electronic Recycling Events Near Me
- Barbie 2021 Holiday Doll
- Really Useful Boxes 6 Drawer Tower Rainbow
- Ps5 Twin Charging Station Vs Dualsense
- Deckled Edge Wedding Invitations Diy
- Wall Mounted Ductless Range Hood Installation
- Best Wireless Earbuds Under $100 2022
- Alexandra Hotel London Paddington
- Teton Sports Explorer Backpack
- Houses For Sale Under $10,000 In Philadelphia
- Directions To Isle Of Capri Casino Boonville Missouri