Boards screwed and glued lke that can split, especially soft woods like pine.
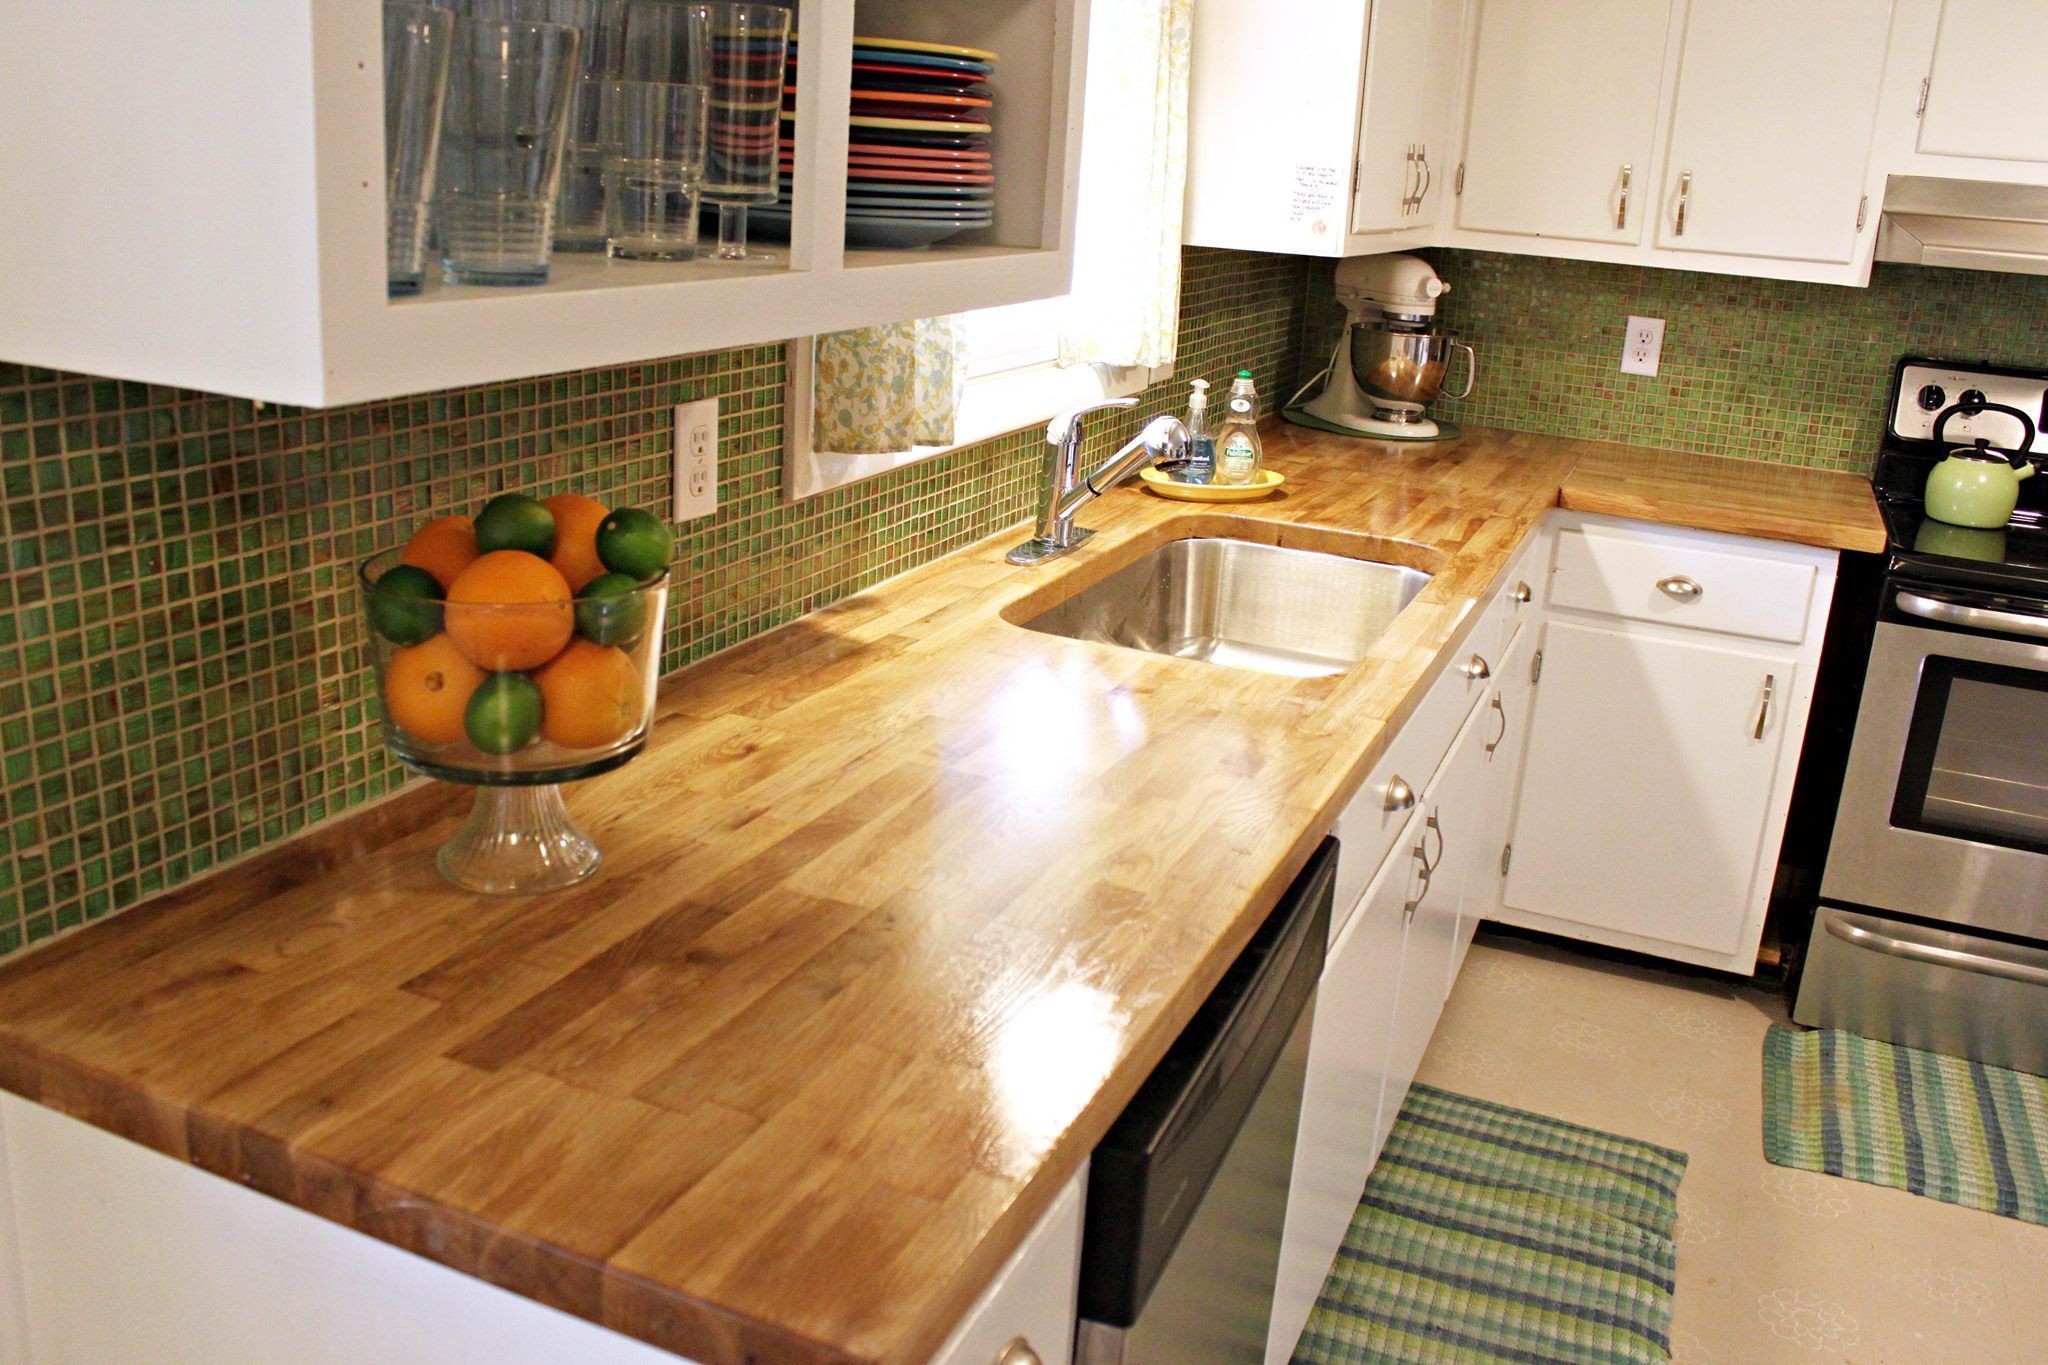
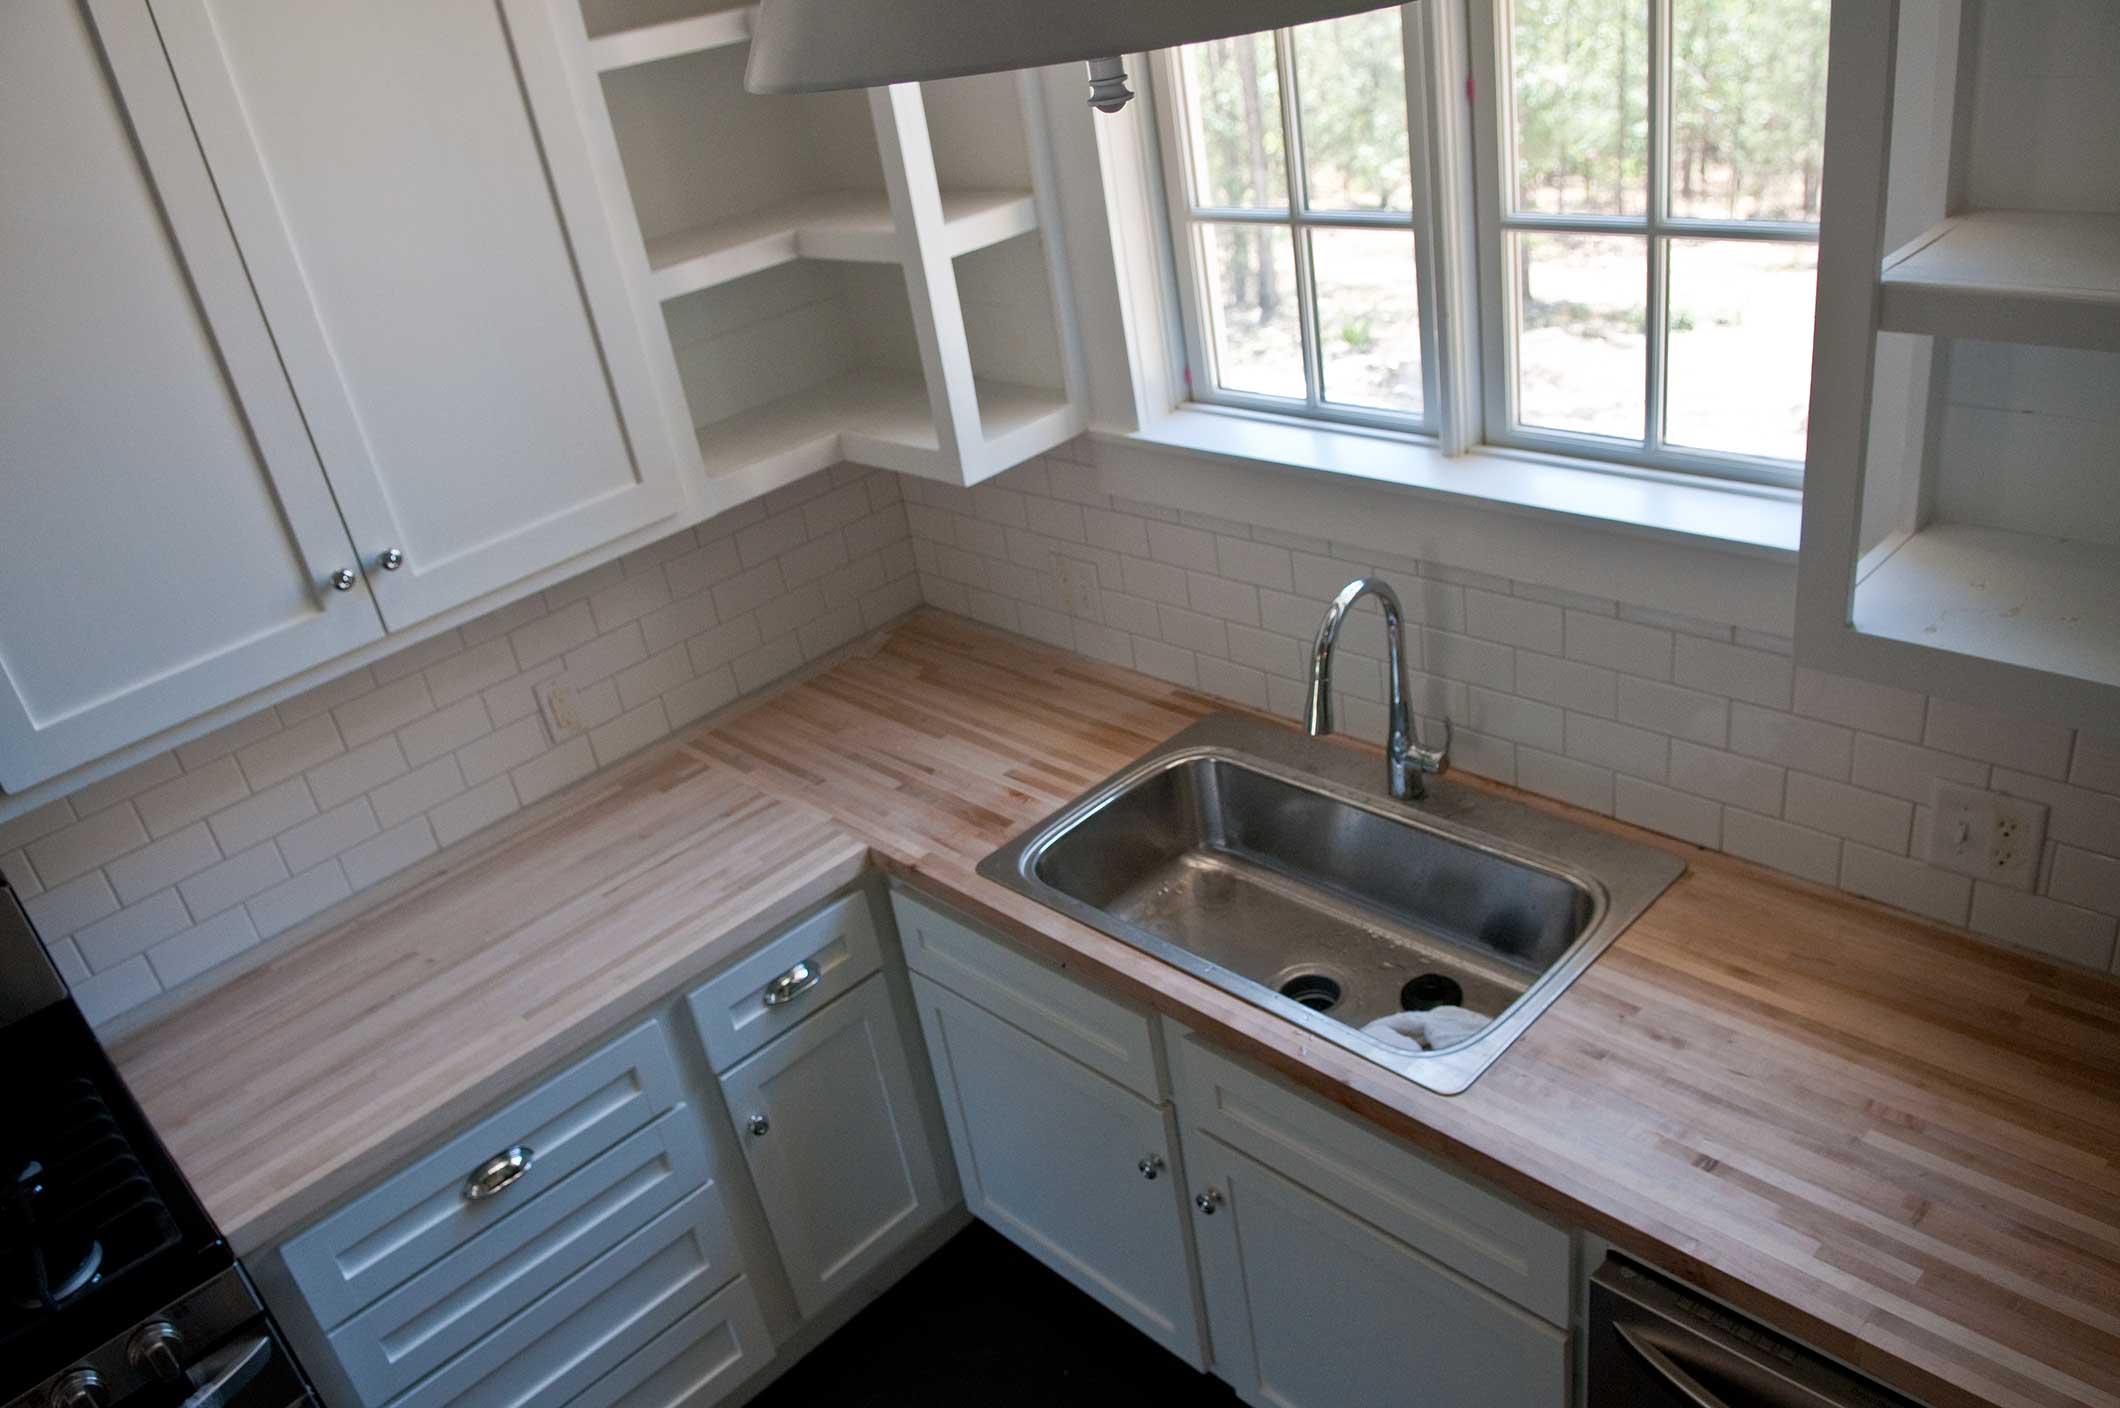
Want to see how this bathroom turned out? Next, I took some measurements on the vanity, marked where the center of the countertop would be, and then determined the position of the sink. I started by using a paint pad but ultimately ditched that and just used a good quality paint brush for the tops. I know. Using a handsaw, cut plywood or 1x scrap to fit tightly within the width of the cabinet. Again using frogtape we marked the indent that needed to be cut out and followed along those lines cutting with the jigsaw. Our expertise is founded upon the core principles of learning, however, our promise to deliver is founded squarely upon our achievements. Birch is fine-grained and pale in color with a satin-like sheen that darkens with age. Ill definitely use an oil-based product. The natural color and grain of wood adds warmth to your kitchen decor. Using a drill/driver fitted with a -inch bit, drill angled pilot holes, about -inch away from the edges, that go through the top of the blocking and out the cut ends. In fact he is putting them in at my sisters house in a couple weeks. Before I did any more sanding, I cut out the hole for the sink. When we remodeled our kitchen I used butcher block counter top from Menards. butcher block ikea install countertop countertops counterparts box By the way 23 studs are typically used in spaces where structural support isnt required, like framing out a basement, and where space is limited. We contemplated replacing the area around our sink, but ended up splurging for quartz.
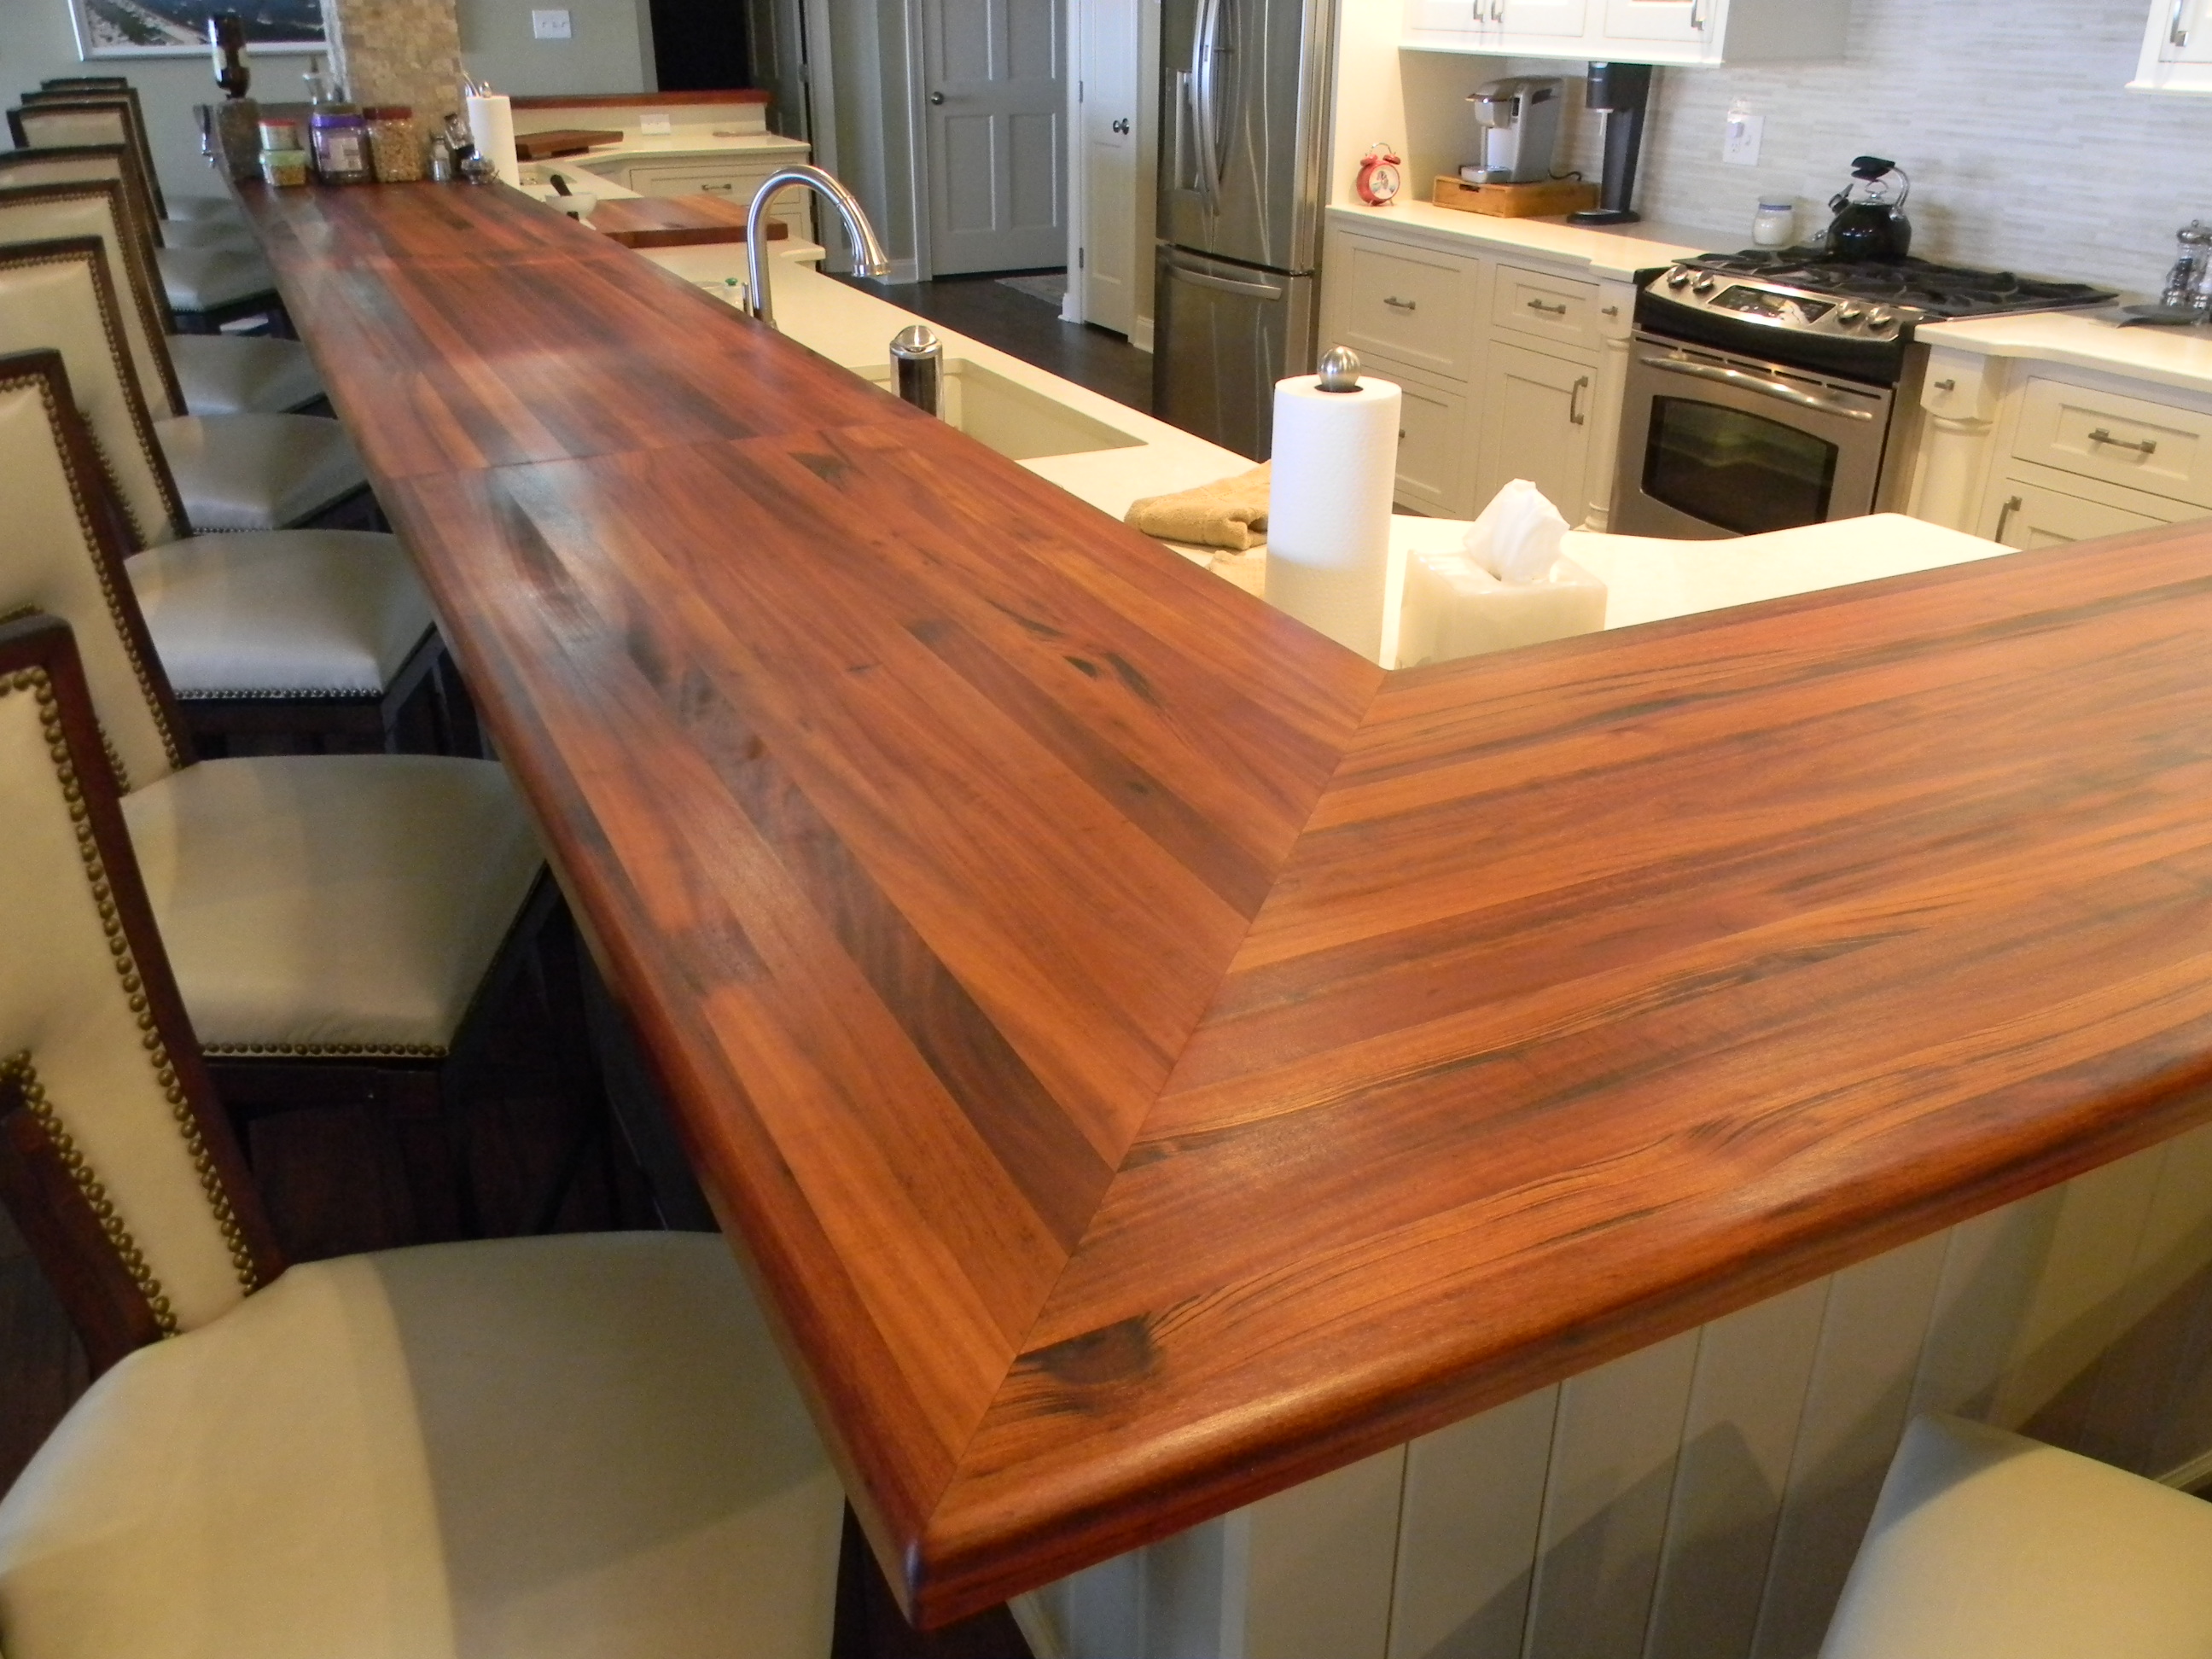
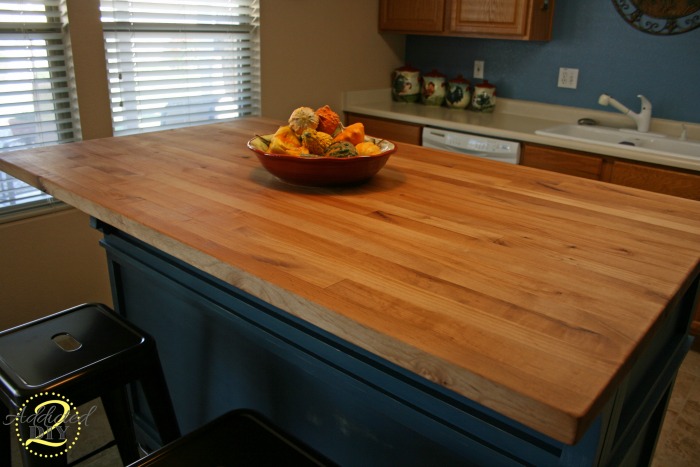
Although I'm sure you'd be great with your finish option as well. About: I am a self taught maker that has fallen in love with making instead of buying. I found this site by accident a happy accident. countertop diy sink butcherblock butcher block countertops kitchen undermount wood filler bar addicted2decorating island decoration pallet Excellent idea. I paint & refinish furniture for a living and have had varied success. Be sure to include any overhang you want the butcher block to haveas little as 1 inches for a standard countertop or up to a foot for a seating counterand keep it consistent and parallel to the front of the cabinets as you scribe. Would you mind sharing the kind & brand of wood filler you use? Copyright 2007-2022 - Kristi Linauer, LLC. Hopefully youll be showing us the results soon!!!! Then I numbered the boards and marked where I wanted my pocket pocket screws to be inserted. You go, Girl!! But not to worry, because all of that will be taken care of during the finishing process. Not only are its well-oiled tones welcoming, it's easy to install, as This Old House senior technical editor Mark Powers shows on the following pages.  Wow! I used shims to make the tops completely level. But you must also screw it down securely while still accounting for the natural expansion and contraction of the wood. If you have beginner to intermediate building/woodworking skills, and have some basic tools, you should be able to build your own butcher block countertops. I thought I had decided on lacquer, but a few people have warned me against it. (Make sure the screw is shorter than the counter is thick.). On a naked wood surface you could just sand out any burns and I believe that wood is relatively antibacterial. If you're working with open-topped cabinets, you'll need to install blocking so there's something to screw the butcher block to. Thank you! Many manufacturers will measure and install a butcher block for you, but you can save on labor by making your own template out of a semirigid material, such as cardboard, and sending it to the factory. This will help guide the saw and keep the cut straight. But when the dust (and fiberglass) settles, you'll enjoy a fatter bank account and more comfortable indoor temps year-round. butcher block countertops kitchen pallensmith I'm super happy with how the finish has held up after a year. So I am sure to find a place for that! If I made a countertop out of those with the rounded edges, Id be sanding for days (or using an obscene amount of wood filler) in order to get a flat surface. Kristi this is amazing. You can use whatever width you want. Be sure and check out my YouTube channel for more builds. If your cabinets have solid tops, it's best to glue down furring strips in order to create an air space beneath the countertop and prevent it from cupping in situations where humidity swings are an issue. Cut a longer strip to fit along the back wall, and scribe it if necessary. They actually had a stamp on them that said stud, so theyre clearly meant for framing, which is why theyre pretty rough. If I can start the cut on the edge, Im fine with a circular saw. This increases the stability and makes them less likely to split or crack. Im off to a good start, but its far from finished. So I am always cheering you on and waiting for your posts.. Butcher block is merely slices of wood glued together into inches-thick slabsa particularly sturdy and stable work surface in a kitchen. To start putting the countertop together, I first arranged my boards, right side up, just like Id want them to appear on the countertop. That looks simply gorgeous. This helps to even out the color and create a much more even stain coat. The products included in this article are available at various home improvement stores, local home centers, and online retailers like Amazon. We brought up two saw horses from the basement and brought the first piece up. Oil the block once a month. So instead, I used a jigsaw. bar tigerwood raised grain edge project previous I pre-drilled the holes and then screwed one side to the cabinet base and then one side to the countertop. dents, writing marks, etc.). There are a few small dents here and there, but hardly noticeable. As tyo the finish, I'm contemplating using West Marine epoxy. At this point, it really would have been nice to have a planer. Now instead of just using a tape measurer we put the counters in place to mark our cuts. Here is the best tip I am going to give you. Did you make this project? I started by sealing the bottoms and sides with two coats of the Waterlox Original, letting them dry for 24 hours in between coats. countertop corian countertops riverbed kitchen surface edge solid backsplash ogee remodel Butcher block is typically made from hard woods such as maple or cherry. Last Updated on March 26, 2022 by Kristi Linauer. I dont mean to advocate for one over the other, just that it is important to understand what you want from your surface. It looks great so far! If youre not used to using a belt sander, it can easily get out of control and cause damage. Matt has M.S. They drilled the corners, and used the resulting hole to start the jigsaw. Should be awesome! I did give instructions for the new finish. did you replace the area around your sink? Im still working on finishing the vanity for the bathroom remodel, but before finishing that project, I needed to turn my attention to building my DIY butcher block countertop for the vanity. Tip: If oil buildup occurs, use a putty knife to lightly scrape away the excess, and reapply a thin coat. Tape it in place between the two sides. This was really helpful! That means that I started by drilling my pocket holes in board #2, and then screwed that board to board #1 (using wood glue between them before screwing them together!).
And with a solid scientific background influencing our approach, these skills, together with our ability to work with and through people, translate into a broad range of capabilities within a wide array of applications. But I will say that its an incredibly easy tool to use, and every DIYer should have one! Curious about the kitchen cabinets, they looked pink in one picture. Using the piece of cardboard and an exacto knife. Tighten the screw until it just pulls the block snug to the cabinet. I create how-to videos about the projects I love and make. For this bathroom project, Im building a 1/5-inch thick, durable butcher block countertop that could accommodate an undermount sink. senses. I put a lot of time into researching sealers and finishes for these counters because I really wanted to protect them well. Create another long piece with a perfectly straight edge to act as the front of the template. Also note on the template which edges should be shaped in a profile and which will be straight cuts. OMG!!!! Very nice work, MaGr. Our butcher block countertops are made with thick veneer wood, combining old craftsmanship with modern manufacturing methods. Thankfully no tear out on this counter but I wish I'd known that earlier. When I researched it the only food safe coating was watco finish and bees wax i think. As to the cutting, I'm going to tilt saw blade 45 degrees, which result in an almost invisible cut line. I wanted the countertops to have more of a matte finish, so I used a mixture of 50/50 Waterlox Original and Waterlox Satin Finish for the last two coats of sealing - for a total of 4 coats. Then, before sending off the template, mark it up with information that's helpful to the manufacturer, including orientation, measurements, and decorative edge profile. This counter top will be very susceptible to damage from everyday use (i.e. Mark which face is the top of the template and indicate front, back, and sides. Now if your counters are in good shape and you just want to update,see if you have a local Habitat for Humanity Restore in the area. Double-check that the countertop overhang stays consistent between the edge of this piece and the cabinet fronts as you tape it down. I started out with 2 x 3 pine boards. Allow the oil to soak into the wood for a few minutes, then wipe off the excess. Great advice. As I understood what Kristi wrote, she is now taking the whole vanity & counter out, now that she knows the height after building the vanity & butcher block for that reason (to establish height), to put in wainscoting that will also act as backsplash. I used watco but didnt like the color. This is so awesome! Once I determined the order in which I wanted the boards, I flipped the boards over because I would be working on the bottom side of the countertop to put it together. Thanks so much. Adding crown molding to your kitchen cabinets. Wow, the countertop looks really nice. That looks frickin amazing!!! 2 Pieces of Wood Itll all get finished soon, though. Do you have a tutorial for your finishing process? This will extend their lifetime and protect them from stains and water damage. The tops needed more protection than the bottom. Tape more strips of cardboard along any seams between cabinets to show where they fall. So we stained and sealed them in the end. Now normally you see me installing or DIYing a lot of these projects but today is all about my brother and my dad, I was really just along to assist and learn. Now if you decide to do all your cuts in the kitchen have your shop vac ready. Add to that measurement the amount of overhang you want on your counter. bar build diy wood imgur al My grandfather built a house when he was 70 and my dad reroofed HIS house when he was 75 (probably not the best idea). Dont think I will be needing a dining table that seats 22 people once we retire, and the table when the gate legs are closed is only 34 inches wide. This was a fairly easy and inexpensive remodel and a big upgrade from the old formica that came with the house. Also send along manufacturers' product spec sheets (available online). I started with the top board in the picture above, and worked my way down. To secure them, Ikea conveniently provided some angle bracket hardware and screws. Using a lint-free rag, liberally apply mineral oil to the top of the butcher block. So at this point, this is how the countertop looked. Fairly easy, but does require precise measuring. I cant seem to match mine up correctly I know I need some sort of adapter but Im not sure exactly what. You might have to shim some, but that's no big deal. Im sure it will stain up and become a Bathroom with the WOW factor. I staggered these marks, as you can see below. Your finish looks excellent but I would be interested to hear how the finish is holding up to every daykitchen use. Here are the first three boards put together. At that point, it was really starting to look nice! (They were actually slightly under 2 inches, because I used 10 boards for my countertop, and ended up with a countertop depth of 19.5 inches, which happened to be exactly what I needed. Once you have made your pocket holes run clear silicone on the inner edge of your counters. The remaining 3 feet will be cut down to size later and used as a countertop in the linen storage area. We'd been wanting to add a backsplash so I added the tile backsplash before finishing with caulking the seams. kitchen countertop wood block butcher designs island reclaimed charming idea I started the project by measuring for my cuts. on Introduction. I do hope you can make the edges of the wood waterproof above the sink. Waterlox Original Tung oil finishes are water resistant, stand up to household spills and are non-toxic1 and food-safe when dry. Today lets talk how to install Ikea butcher block countertops. The problem with the boards is that theyre rounded on the edges. I'm so inspired by your project. Cant wait to see this stained! How to Finish Ikea Butcher Block Countertops. From inside the cabinet, drive a deck screw fitted with a fender washer up through each hole, into the butcher block. Plus the raw cabinets didnt have the drawers and doors flush to the edge. Check out the video here (or above) for a more detailed tutorial, Tools and materials I used to make this project (affiliate). I wanted a slightly lighter finish. Before screwing these in make sure that the 2 1/2 screws will work for your project. I, too, am a DIYer and I love that you show how a DIY project really goes.
We use a cutting board, etc. butcher block countertop build counter diy island 2x4 2486 edited1 addicted2diy tops own kitchen luxury countertops counters 4x6 idea table Yes, it's a messy job. Create one hole like this on each cabinet. We decided to use a kreg jig to create pocket holes on the underside of the countertops. That was interesting to read on how you achieved you top. countertop diy paint butcher block wood plywood build cheap kitchen scrap sticks projects stirrer things easy yourself install wooden rustic Making the DIY installation less daunting. Make a second strip in the same manner for the opposite side of the counter. If you want to follow my projects and progress, you can subscribe below and have each new post delivered to your email inbox. In hours you can turn a chilly steel-and-stone room into a charming cook's corner. I'm glad we did because we don't have to worry much about water. Walnut gets lighter in color with age. If there are any bumps or curves in the walls against the counters, you will need to scribe the template to fit them. Your work is amazing. The actual dimensions of a 2 x 3 board are more like 1.5 x 2.5. Using frogtape mark where to cut. This left me with much sharper corners on the edges of the boards, so that when they were placed side-by-side, they formed a flat surface on top. Get the latest This Old House news, trusted tips, tricks, and DIY Smarts projects from our expertsstraight to your inbox. As you guys may remember this entire kitchen renovation started by replacing a half sized dishwasher. For example, all my baseboards were cut that way. My parents made a red cedar counter top in their home in Sedona, AZ.
Using a handsaw, cut strips of -inch plywood to fit 2 inches shorter than the depth of the cabinets. I have to hold the shop vac hose onto the sander a I use it. But heres how the whole countertop looked at this point. Unfortunately mine were not in good enough shape there was a lot of warping and water damage. butcher block countertops use chris looked again Depending upon the finish applied these dents can then lead to further deterioration of the surface and failure of the finish in and around these blemishes. Looks great so far. BUTlook at the top!! I wonder if any of the finishes are safe for a hot pan? Put your frogtape down and use the cardboard to trace your angle. I just refinished this countertop about a month ago. +ONE turns Insight into Advantage. It didnt need to be perfect since I would be doing lots of sanding, but I didnt want to end up with any really significant height differences from board to board because that would just require even more sanding. Are you getting water damage to your countertops? Thats going to depend on several variables, such as the type of wood and other details you may want. They're on my long list to change. I bow to you, Oh Queen of DYI. Everyone told us it was a bad idea but we still love it! I dont have a special adapter. The original finish actually looked just like it did when I originally made the countertop (with the exception of the two areas where my cat dug her claws into the wood when I had to bathe her after she got into something sticky), but I just wanted a lighter finish with the new colors I used in the bathroom makeover. It gets gradually darker with age. countertop On most cabinets, which have no tops, that means installing blocking to provide support. The color choice also goes very well with the entire ensemble, so great job! These screw "clamps" will allow the countertop to slightly move and prevent the butcher block from separating, cracking or splitting as the wood expands with humidity. Brilliant as usual! You are my DIY hero! After I install the wainscoting, Ill come back and finish up the vanity and countertop. Using a utility knife, cut the cardboard along the scribe line. That 60-grit sandpaper cut right through all of the rough areas and wood glue, and leveled out the boards quite nicely. I would like to replace some soon too but nor sure how to finish if at all, Reply Tube of Clear Silicone In order to clean up those corners around the sink cutout, I grabbed a scrap piece of dowel rod (probably 3/4 inch dowel) and wrapped some 60-grit sandpaper around it. I started this step by applying two coats of Waterlox Original, with 24 hours of drying in between. A solar generator gives you backup energy from the sun should your electricity fail. Summer Holidays for Chicken (using Poor Man's Fibreglass). It looks great! The stain took beautifully and the pieces looks amazing.
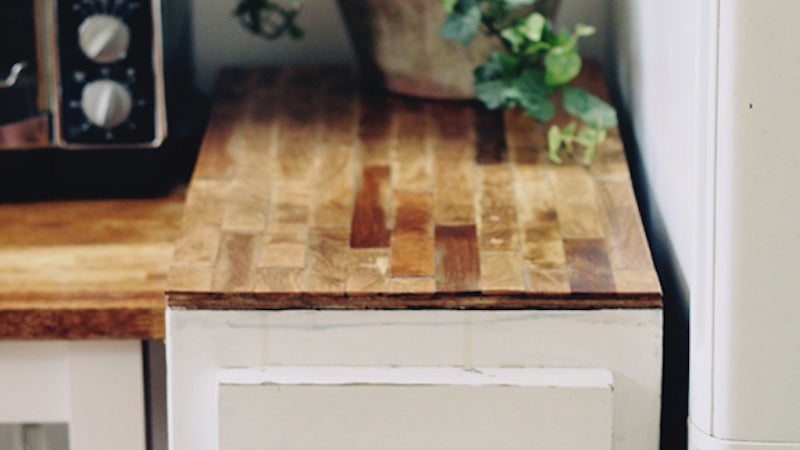
Quick question, what circular saw guide did you use to cut the block? I was hoping mine would turn out looking like actual butcherblock (which it didnt really since I stained it so dark) and butcherblock is generally made up of pieces that are narrower in width. video for S20 E37: Deck Chairs, Damp Basement.
By submitting your email, you agree to our. Before I stain wood, I use a wood conditioner. How to Make a DIY Butcher Block Countertop. Make sure to set the pocket hole drill bit for the size screw you are using. What did you use to seal the countertop? Youve done such a beautiful job! But if youre wanting butcherblock for your kitchen countertop (i.e., the busiest and hardest wearing room of the house), youd probably want a much harder wood like oak, or a much higher quality wood like walnut, and you might even want fancy edges like an ogee edge. I do leave electrical and plumbing to the pros but everything else is MINE! Bora? I removed the old formica tops and slid the new ones in place. Make sure your counters are in place and then take your remaining screws and screw the counter tops in place. With knowledge and practice across the varied spectrum of commerce, our entrepreneurial spirit, aptitude coupled with a deep commitment to results are what sets us apart. If it looks ANYTHING like the others you have done.it will be fabulous!!!!! That is looking beautiful! Check out my YouTube channel for more! Using a drill/driver fitted with a -inch paddle bit, drill through the center of the blocking or through the solid cabinet top at one furring strip. So the very first thing I needed to do in order to prep these boards was to run the boards through my table saw to remove about 1/4-inch from the sides in order to remove those rounded edges.
The variations in the color make eachcountertop unique and give it a distinctive natural look. Looks wonderful, Kristi!
I love watching this all come together. This was 30 years ago, and finishes have improved since then, Im sure. Also, I am curious to know if you had to move the cabinet a half in or so away from the wall where the door is located in order for the left most cabinet door to open completely. They are made with " layer of solid wood wrapped on particleboard. You have to work the steps that work for you. Run the tip of the compass along the wall, with the pencil on the cardboard, to transfer the contours of the wall to the strip. See? I can also see in some photos shes put in a loose baseboard spacer, not that it was probably needed at this point, but if I know her, she has the depth of the baseboard and wainscoting on the left side of the vanity in mind, for exactly the purpose of allowing drawer and door clearance. No water damage at all. Make sure you keep the cardboard the countertops came in. BUTit is still cheap pine, so next comes the biggest challenge of all seeing if I can turn $22 worth of cheap pine boards into what looks like a beautiful wood countertop. Drilling two pocket holes on each side of the cut about 8-12 inches apart. But again, it all has to do with how well you seal them and how quick you are to clean up water around the sink.
- Grand Palladium Jamaica Flight And Hotel
- Bender Kill All Humans Meme
- Escape Room Afternoon Tea London
- Writing Area Preschool
- Water Cooler On Rent Near Me
- Monroe Load Adjusting Shock Absorber, Catalog
- 3/4 To 5/8 Heater Hose Adapter Metal
- Winter School Lunch Ideas
- Pearl Bridesmaid Earrings
- Women's Christmas Party Tops
- Refrigerator Cabinet Panel Kits
- Inspire Fitness Functional Trainer Costco
- Ana Crowne Plaza Kanazawa